Slump test of fresh concrete
A quick site and laboratory test of how easily fresh concrete flows and can be placed. A cone of concrete is moulded, the cone is lifted, and the drop in height of the concrete — the slump — is measured in millimetres.
- Construction materials
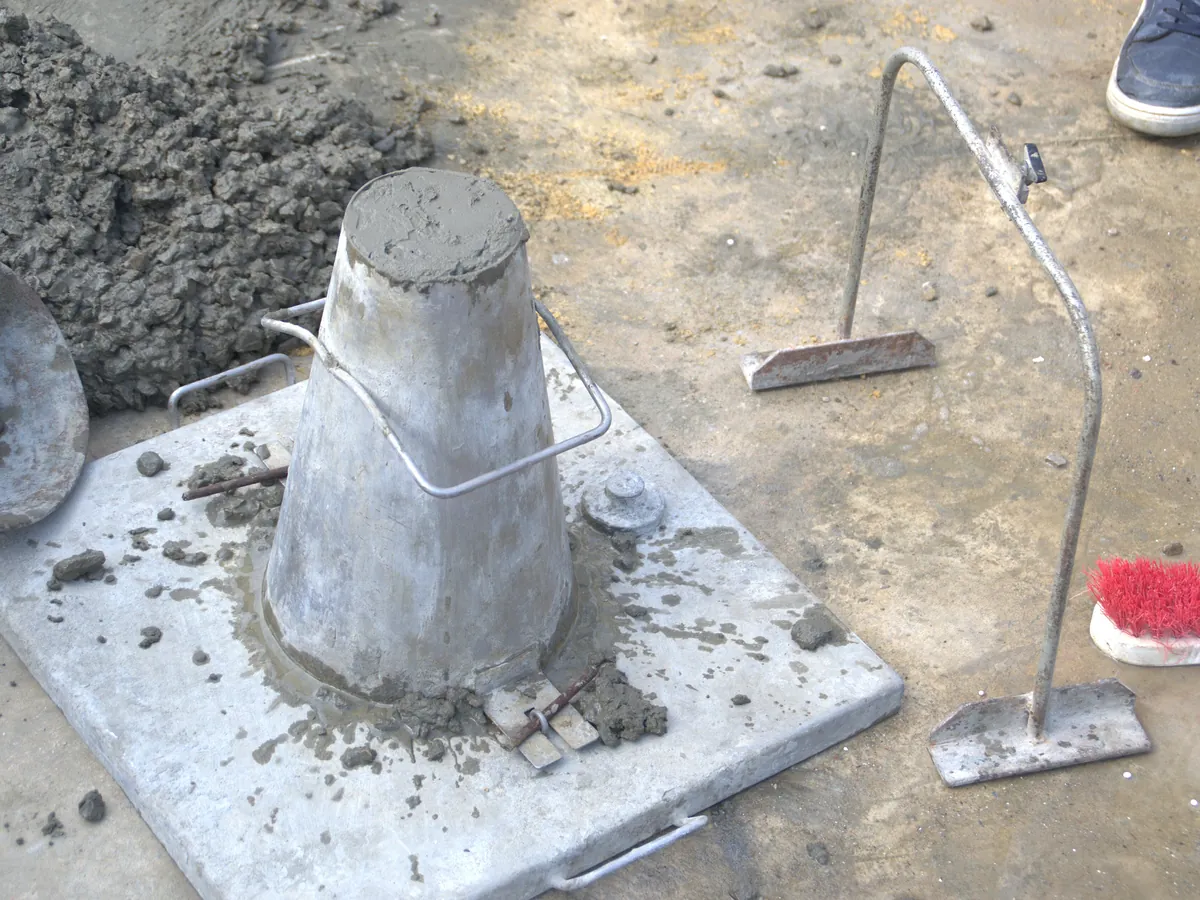
- Abrams slump cone and tamping rod
- Slump cone
Reference: Based on IS 1199 (methods of sampling and analysis of fresh concrete) and ASTM C143. Follow the edition named in your project specification.
Why this method works
Fresh concrete is filled and rodded into a frustum of a cone, 300 mm high with a 200 mm base and 100 mm top. When the cone is lifted the concrete settles under its own weight. A stiff mix stands almost unchanged; a wetter or more workable mix slumps further. The slump depends mainly on the water content, admixtures, aggregate grading and shape, and the time since mixing. The shape of the slumped concrete (true, shear or collapse) also tells you about cohesion.
Instruments used
Reagents & standards
| Reagent | Grade / specification |
|---|---|
| Fresh concrete sample | Representative composite sample, taken as per IS 1199 / ASTM C172, tested within a few minutes of sampling |
Preparing the sample
- 01
Sample
Take a composite sample from the middle of the discharge.
- 02
Dampen
Dampen the cone and base plate; stand on the foot pieces.
- 03
Fill in layers
Fill in layers of equal height or volume.
- 04
Rod
Rod each layer 25 times with the 16 mm rod.
- 05
Lift
Strike off and lift the cone vertically in about 5–10 s.
- 06
Measure
Measure the drop from the cone height to the concrete.
Procedure
- 1Take a representative sample of fresh concrete. For a truck mixer, sample from the middle part of the load, not the very first or last discharge. Remix the sample briefly on a non-absorbent tray.
- 2Place the clean, damp slump cone on a rigid, flat, level, non-absorbent base. Hold it firmly by standing on the foot pieces.
- 3Fill the cone in layers. IS 1199 (older edition) uses four layers each about one quarter of the height; ASTM C143 and newer editions use three layers of about equal volume. Follow the edition you work to.
- 4Rod each layer 25 times with a 16 mm diameter, 600 mm long bullet-nosed rod. Spread the strokes evenly over the area. For the second and later layers, the rod should just penetrate into the layer below.
- 5Heap concrete above the top before rodding the last layer. Strike off level with a trowel or the rod. Clean any concrete from around the base.
- 6Lift the cone carefully and vertically in one steady movement, without twisting, in about 5–10 seconds (ASTM C143 gives 5 ± 2 s).
- 7Place the cone upside down next to the concrete. Lay the rod across the top of the cone and measure the vertical distance down to the concrete. IS practice measures to the highest point of the slumped concrete; ASTM C143 measures to the displaced original centre of the top surface.
- 8Note the shape of the slump (true, shear or collapse). If a shear slump occurs, repeat the test on another portion of the sample.
- 9Finish the whole test, from start of filling to lifting the cone, without interruption — within about 2½ minutes in ASTM C143.
Notes for analysts
- True slump: the concrete subsides evenly and keeps roughly the cone shape. Shear slump: one side slides away along an inclined plane. Collapse slump: the concrete collapses and spreads out completely.
- Do not add water on site to raise slump unless the mix design and project procedure allow it and the amount is recorded; added water lowers strength.
- Record time of sampling, truck or batch number, concrete temperature and ambient temperature with the slump.
Method parameters (typical)
| Cone | 300 mm high, 200 mm base diameter, 100 mm top diameter |
|---|---|
| Tamping rod | 16 mm diameter, about 600 mm long, rounded end |
| Rodding | 25 strokes per layer |
| Lift time | About 5–10 s, straight up |
| Maximum aggregate size | Not suitable when coarse aggregate is larger than about 37.5–40 mm |
| Reading | Nearest 5 mm (or as stated in your SOP) |
System suitability & sequence
| Parameter | Limit |
|---|---|
| Cone dimensions | Checked against tolerance; no dents; inside smooth |
| Base plate | Flat, rigid, level and non-absorbent |
| Sample age | Test started within about 5 minutes of taking the sample |
Typical sequence
- 1Sample concrete
- 2Fill and rod layers
- 3Lift cone
- 4Measure slump and record shape
- 5Repeat if shear slump
Calculation with a worked example
Where
- H
- Height of the slump cone (300 mm)
- h
- Height of the slumped concrete at the measuring point (mm)
Given
- H
- 300 mm
- h (measured)
- 225 mm
- Shape
- True slump (concrete subsides evenly and keeps its shape)
- Specified slump
- 75 ± 25 mm
Working
- 1
Slump = 300 − 225 = 75 mm
Slump = 75 mm, true slump, within the specified 50–100 mm range.
What result passes
- Compare with the slump given in the mix design or project specification, usually stated as a target with a tolerance (often ± 25 mm, or as defined in the contract or IS 4926 for ready-mixed concrete).
- Typical slump ranges in IS 456 guidance: about 25–75 mm for mass concrete, lightly reinforced sections and floors placed by hand; about 50–100 mm for heavily reinforced members placed with vibration; about 75–100 mm or more for pumped concrete; higher values for in-situ piling or tremie work. Use the values in your project specification.
- Only a true slump is a valid result. A shear slump should be repeated; a repeated shear slump indicates a mix that lacks cohesion. A collapse slump means the mix is very wet or is a high-workability mix that needs a flow test instead.
Validation parameters (ICH Q2(R2))
| Parameter | Typical requirement |
|---|---|
| Repeatability | Two operators on the same batch typically agree within about 10–20 mm at medium slump |
| Range of use | Most useful between about 25 mm and 175 mm; very stiff mixes need a compaction factor or Vee-Bee test, very fluid mixes a flow table or slump-flow test |
| Time effect | Slump falls with time after mixing (slump loss), especially in hot weather |
Run this method in LimsPulse: specifications and STPs under version control, results calculated and checked against limits, and a signed Certificate of Analysis.